Custom Collectors
This guide is only for expert users who want to implement their own collector. Custom collectors are created in ABAP.
Custom collectors enable you to create custom KPIs, which are collected according to the logic you defined in the custom collector. The instructions below explain how to create a custom collector with a custom KPI:
For more information about collectors in general, see the chapter Collectors.
Creating a Custom Collector with a Custom KPI
Step 1: Create a custom collector
-
Go to the class builder by starting transaction SE24.
-
Enter the class name /DVD/MON_CL_COL_TEMPLATE and select the Display option.
-
In the toolbar, select the option Display object list (Ctrl+Shift+F5).
-
Right-click the class /DVD/MON_CL_COL_TEMPLATE and select Copy (Ctrl+F5).
-
In the field Copy, enter the name of your custom collector class starting with a capital Y* or Z*.
-
In the screen for creating an object directory, select Local objects (F7).
-
Display your class and activate it.
Step 2: Add your custom collector to the CrystalBridge® Monitoring collector list
-
Click Settings > Collector settings. Alternatively, you can start transaction /DVD/MON_COL.
-
Click New Entries.
-
Enter your custom collector name with its description. Leave the License key field empty.
Step 3: Define a custom KPI
Define the custom KPI as described in the chapter Defining a Custom KPI. After creating the KPI definition, return to this step to complete the creation of the custom collector.
Step 4: Implement the logic of your custom collector
-
Start transaction SE24.
-
Open your custom collector class in the class builder.
-
Go to the method /DVD/MON_IF_COLLECTOR~COLLECT_DATA.
-
Implement the method /DVD/MON_IF_COLLECTOR~COLLECT_DATA.
During the implementation of the calculation logic for a KPI, you can use the collector features below.
Features of a Custom Collector
Custom Collector Parameters (Optional)
If you have set parameters for your custom collector, you can obtain the parameter values by using the collector method get_parameter().
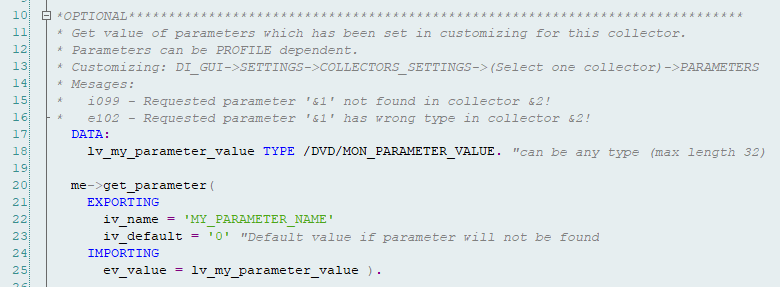
Instead of MY_PARAMETER_NAME, use your own parameter name as defined for your custom collector. For more information about collector parameters, see the chapter Parameters of Collectors.
Proceed as follows to create a parameter for a custom collector:
-
Start transaction /DVD/MON and click Settings > Collector settings. Alternatively, you can start transaction /DVD/MON_COL.
-
Select your custom collector name.
-
Double-click Parameters.
-
Click New Entries
-
Enter your parameter name and its value.
-
Click Save.
Input Table (Optional)
You can define input values for your collectors, which are sent from the central system to this collector. To obtain these inputs in your collector, you must use the collector method get_inputs().
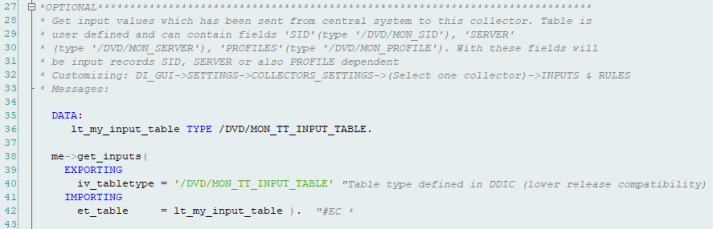
Instead of /DVD/MON_TT_INPUT_TABLE, use your own created table for input values.
Detail Table (Optional)
You can define detail tables for your custom collector. Detail tables store additional information about collected KPIs.
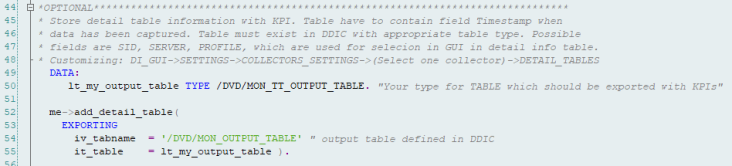
Instead of /DVD/MON_OUTPUT_TABLE, use your own created detail table name. For more information about detail tables, see the chapter KPI Details Displayed in a Detail Table.
If you want to create your own detail table for your custom collector, see the chapter Creating a Detail Table for a Custom KPI Assigned to a Custom Collector.
KPI Values (Mandatory)
You must implement the logic of your custom KPI calculation in the collector. You can calculate and save multiple KPIs for one collector. To display the KPI values in CrystalBridge® Monitoring, you must save them for each KPI using the collector method add_kpi().

Instead of MY_KPI_01 and MY_KPI_02, use your own custom KPI names.
After you have finished and activated the implemented logic of your custom collector, the next step is to specify the monitoring profile of a KPI as described in the chapter Defining Monitoring Profiles for KPIs.